Web Design & Development Using Joomla
1. Introduction To CMS and Joomla
1.1. Content Management System (CMS) is a system that creates, stores, manages and control distribution of digital contents.
1.2. Digital contents include html files, audio/video format file and other form of digital media.
1.3. Joomla is a popular CMS because it has worldwide community of users.
1.4. Steps to install Joomla:
1.4.1. Setup Apache Server, MySQL and PHP. (AMP)
1.4.2. Copy Joomla script (downloadable from joomla.org) to the root folder.
1.4.3. Setup Database and Database User.
1.4.4. Run install scripts.
1.4.5. Delete installation folder.
1.5. Web server often comes in a package such as AMP (Apache, MySQL and PHP; they are popular because they are open source programs.)
1.5.1. Apache is a web server; we need a web server to manage web page requests.
1.5.2. MySQL is a database server; we need a database server to store Joomla application setting and data.
1.5.3. PHP is a language processor/parser; we need PHP to process Joomla web page requests.
1.5.4. We also need a File Transfer Program (FTP) to help us transfer files from our computers to the web server computer.
1.6. When a web server runs on a host computer, the user of that computer can access its website via web browser by the address localhost, e.g. “http://localhost”.
1.7. If users from other computers wish to access that website, these users have got to know the address of the host computer; either by IP number or domain name for that host computer. e.g. “http://192.168.1.1/joomla” or “http://mydomain.com/joomla”.
1.8. Joomla provides access to its systems through :
1.8.1. Front-end; the page for normal users.
1.8.1.1. Normal users may read or write articles on Joomla website.
1.8.2. Back-end; the page for administrators.
1.8.2.1. Administrators manage the functions of the Joomla website.
2. Install Webserver Package (UsbWebserver)
2.1. Goto website usbwebserver.net and download the package. (at the time of this writing, current package is version 8.5)
2.2. Unzip the package to C:\. e.g. C:\usbw\{unzipped content here}
2.3. Run the file usbwebserver.exe and test ROOTDIR, LOCALHOST and PHPMYADMIN
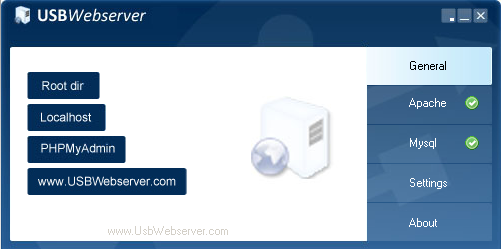
The above image shows the UsbWebServer Control Panel that will pop out when usbwebserver.exe runs. Test the server by clicking (1)“Root dir”, (2)“Localhost” and (3)“PHPMyAdmin” buttons.
Make sure that the Apache and MySQL signal is in green color. If it is red color, the server are not running, probably they have been blocked by the firewall program
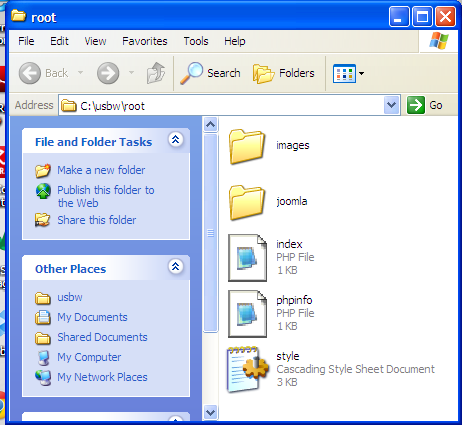
(1)”Root dir”. Windows Explorer shows the contents of the root directory of the webserver.

(2)”Localhost”. The start page of website powered by UsbWebServer. It indicates that the web server is running well.
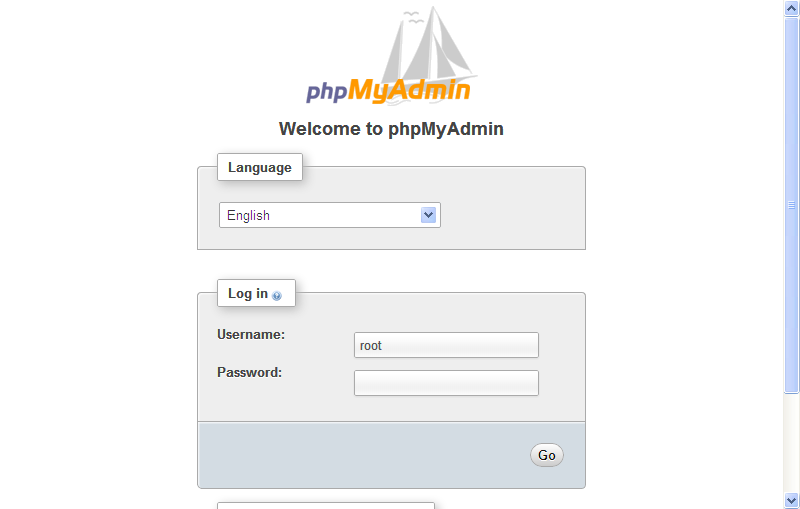
(3)PhpMyAdmin. The login page for PhpMyAdmin (MySQL Database Front End). It indicates that MySQL is running well.
3. Install Joomla
3.1. Goto website joomla.org and download package. (at the time of this writing, current package is version 2.5)
3.2. Unzip the package to ROOTDIR (in step 2.3), e.g. C:\usbw\root\joomla\{unzipped content here}

The above image shows the “usbw” folder that is placed in C:\, i.e “c:\usbw\{unzipped content of usbwebserver here}”. Take note that in “usbw” there is a folder named “root”. This is the folder into which joomla package will be extracted, i.e “c:\usbw\root\joomla\{unzipped content of joomla package here}
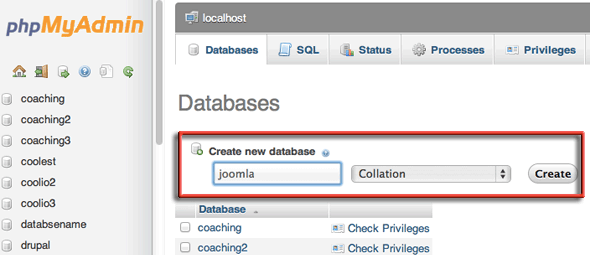
3.3. Goto PHPMYADMIN (http://localhost:8080/phpmyadmin).Create new Database, e.g. joomla. Create Database User, e.g. JoomlaAdmin. Keep details of Database Name and Database User/Password. It will be needed later during installation.

3.4. Using web browser, goto to http://localhost:8080/joomla/installation/index.php

3.5. Observe pre-installation check

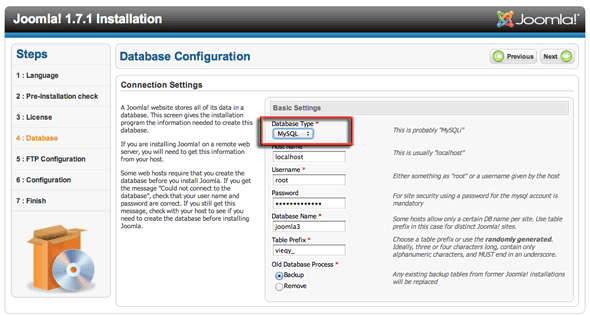
3.6. Configure Database Connection.
3.7. Configure FTP connection.

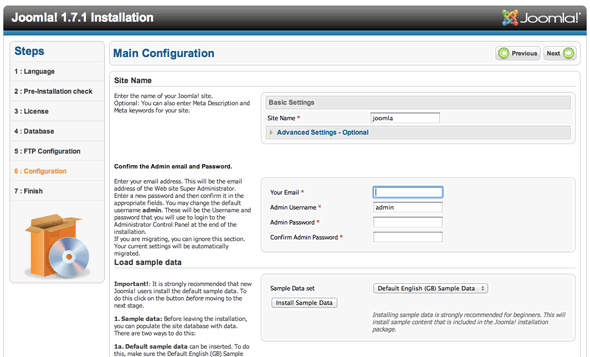
3.8. Configure Main Website.
3.9. Delete Installation Folder.
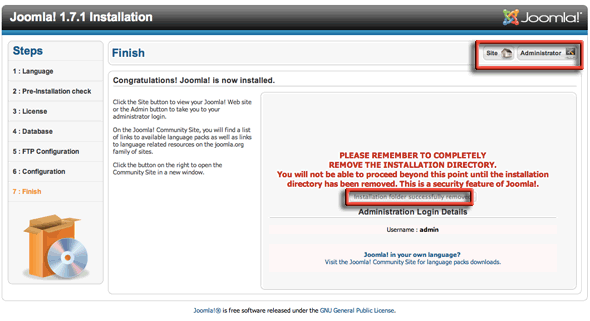
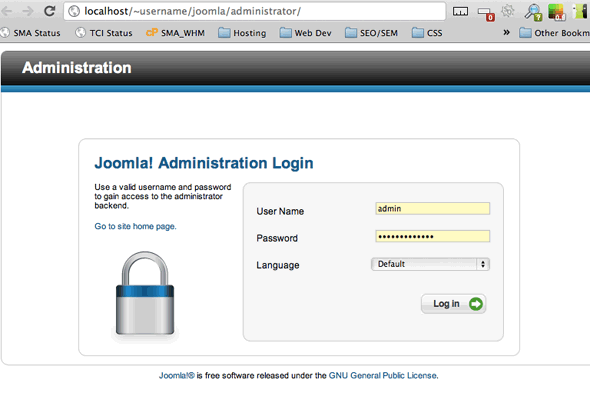
3.10. Test Administration Login.
4. Joomla Administration Page
For beginners, Joomla Administration Page provides the short cut buttons:
a. Add New Article
b. Article Manager
c. Category Manager
d. Media Manager
e. Menu Manager
f. User Manager
g. Module Manager
h. Extension Manager
i. Language Manager
j. Global Configuration
k. Template Manager
l. Edit Profile

4.4. The first thing that an Administrator would do normally is to change the layout of the Joomla website.
4.4.1. Administrator can set default template for site and administrator page by clicking “Template Manager” short cut button. The active template is denoted by star symbol in the column “default”.
4.4.2. Administrator may upload new template by clicking “Extension Manager” short cut button. There are a lot of free Joomla templates downloadable from websites like joomla24.com. These template packages are in the form of zipped file. Upload the file using “Extension Manager” page. Uploaded package will appear in “Template Manager” page.
4.5. To start publishing and sharing contents, Administrator may need to create users. It could be ordinary users, authors, administrators or other types. Users such as authors will be able to write article when they log in through the Front-End.
4.5.1. Articles can also be written through Administration Page. Click “Add New Article” Short Cut button to start writing article. Save the article when it is done.
4.5.2. Saved Articles will appear in the “Article Manager” page. This can be reached by clicking “Article Manager” short cut button.
4.6. Content may include multimedia file such as pictures. These can be uploaded to Joomla website using Media Manager.
4.6.1. Click “Media Manager” short cut button.
6 comments:
PHP is an evergreen web development programming language where it is the top preference for every developer. Thanks for your update on PHP language.
PHP Training Chennai
PHP Training Institute in Chennai
Great Post! you have done a great job. Thanks for sharing it with us. Well done and keep posting Joomla.
It really is a very useful information that you have shared and it looks very good afterward.
www.digiorbite.com
Amazing blog... thanks you to Shearing this
Regards,
PHP Training in Chennai | PHP Course in Chennai
I am really interested to continue reading your blog. You have shared valid info. Waiting for more updates from you.
IELTS Coaching in Mulund
IELTS Training in Mulund West
IELTS Courses in Mulund
IELTS Coaching Centres in Mulund
IELTS Centres in Mulund East
Great post, thanks for sharing wonderful information, keep posting Java Course In Pune
Post a Comment