Starting MW2010
Application Interface
Creating New Document
Opening Document
Clipboard Functions
Change Case Formatting
Starting MW2010
(Expected duration: 1 minute)
Click START button. Click ALL PROGRAMS. Click MICROSOFT OFFICE folder. When the submenu appears on screen, click Microsoft Word 2010.
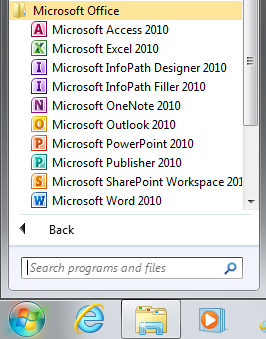
You may proceed to the next exercise.
Application Interface
(Expected duration: 5 minutes)
When MW2010 starts, its application window will look like the following image.
The meaning of each MW2010 application window component:-
| No | Name | Description |
| 1 | Quick Access Bar | Displays commonly used short cuts |
| 2 | Title Bar | Displays Document Name and Application Name |
| 3 | Window Control Bar | Displays Close Button, Restore/Maximize Button and Minimize Button |
| 4 | Ribbon | Displays application menu. (The Show/ Hide button is marked by the triangle symbol (4a)) |
| 5 | Document Window | Displays document content |
| 6 | Status Bar | Displays content options |
| 7 | Viewing Bar | Displays viewing options |
z
1
2
3
4
5
6
7
4aa
Close MW2010.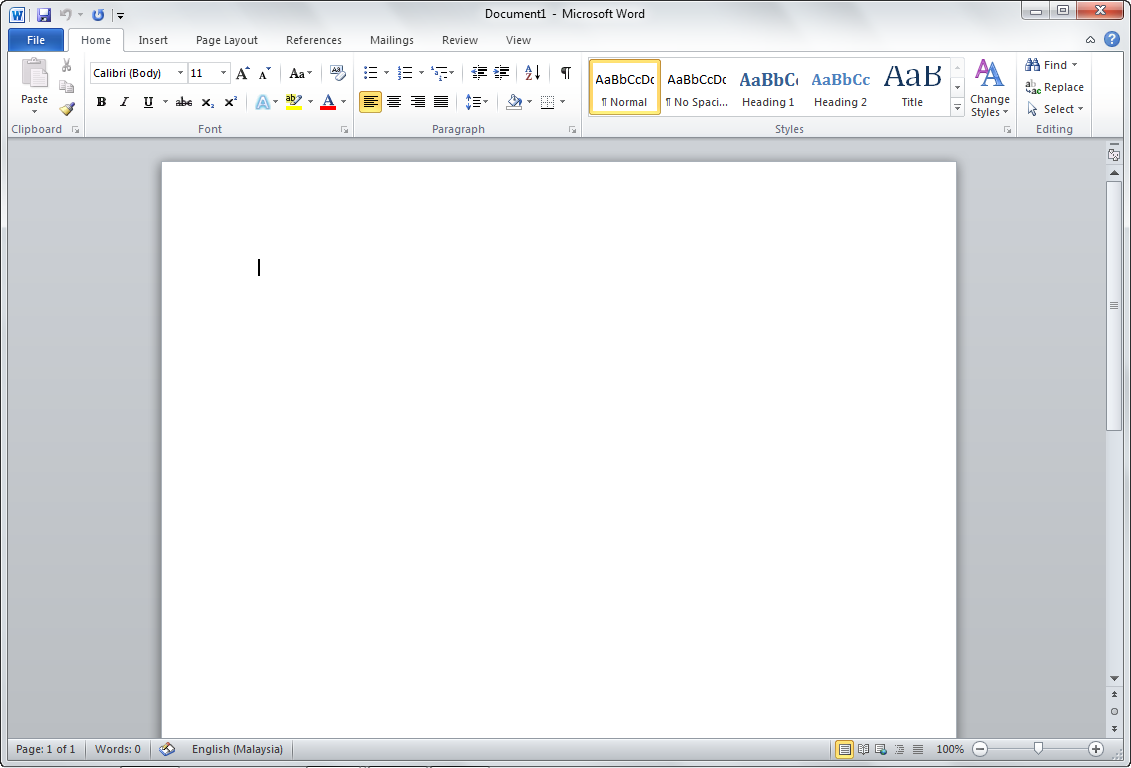
Creating New Document
(Expected duration: 10 minutes)
Start MW2010.
By default, MW2010 will create a new document and assign a name “Document1” to it. You can check this by looking at the Title Bar.
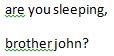
Type the following texts to the content window.
| are you sleeping, brother john? |
The final output will look as follows.
 |
Save the document by clicking the Save Shortcut Button.
 * * |
The Save Dialog Window appears. MW2010 provides the suggested name as “Doc1.docx”. The extension “docx” is a standard extension file format for MW2010 documents. Save the document using the suggested name in the “Documents” folder.
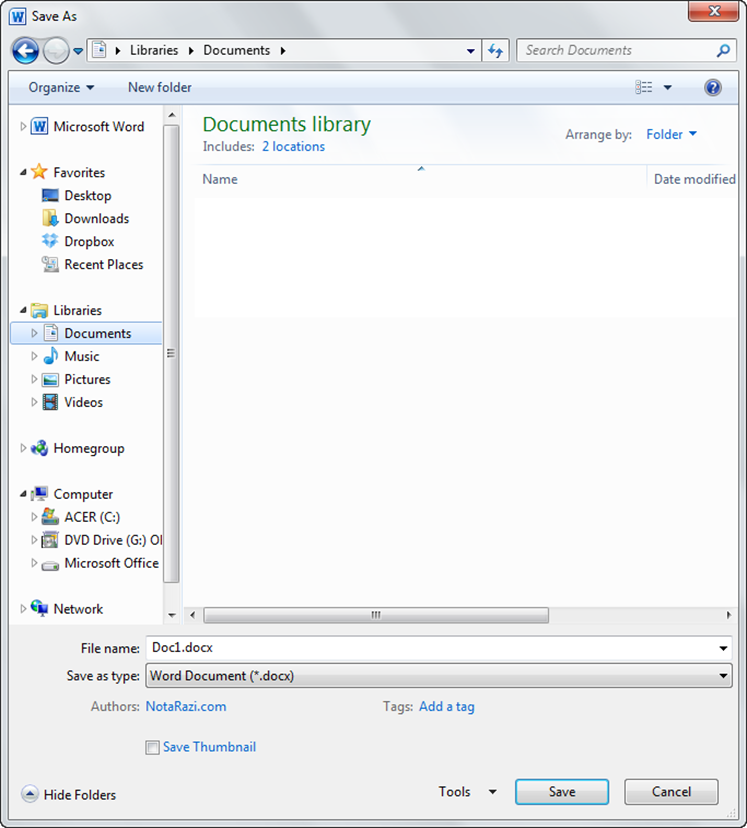 * * |
Close MW2010.
By completing this exercise, you have learned to:
Create new document.
Type document contents.
Save using Save Short Cut Button.
Saving a document into a specific folder in the computer.
Opening Document
(Expected duration: 10 minutes)
In the previous exercise, you have saved “Doc1.docx” in the “Documents” folder. This exercise will reopen the document for further editing.
Start MW2010. Notice that the new empty document is created having the default name as “Document1”.
Go to Ribbon and click File.
MW2010 will show the File Tab which occupies the entire Document Window. The File Tab automatically shows the recent item. Click the document name (1).
1
 |
NOTE: We refer to this action path as File Tab>>Recent>>Doc1.docx. This style of ribbon menu referencing is applicable throughout this manual.
You should see the following content. Notice that certain texts have got green zigzag underline beneath them. This is an automatic spell checker which indicates that the text spelling might not be grammatically correct. However, we will ignore this warning for now.
| * |
Add the following texts on the new line following the existing content.
| morning bells are ringing! ding, dang, dong. |
The final content will look as follows.
 * * |
Go to File Tab>>Save as “brother-john.docx”
Close MW2010.
By completing this exercise, you have learned to:
Use File Tab.
Open a recent document using the File>>Recent item.
Edit the existing document.
Using Save As menu.
Clipboard Functions
(Expected duration: 15 minutes)
Start MW2010.
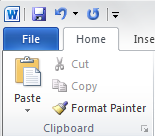
The default Ribbon Tab shown on the screen is called Home. The first menu group from left is called Clipboard. Clipboard provides Copy and Paste functions.
 * * |
Go to File Tab >> Recent >> brother-john.docx
| * |
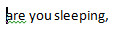
We will perform text selection. Point the mouse to the left of the letter ‘a’ in the sentence “are you sleeping,” and Left-Click. A blinking cursor appears to the left of the letter ‘a’.
 * * |
Point the mouse to the blinking cursor, Left-Click (don’t lift your finger from the click button) and drag the mouse pointer to the ‘,’ as follows
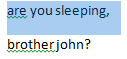 * * |
The above effect is called text highlight. Highlighted text can be further processed in various ways. One of them is the copy function. Go to Home Tab and click the Copy Button (1).
1
 |
Click the mouse pointer after the ‘,’ as follows.
 * * |
Go to Home Tab and click Paste Button (1).
1
|
The copied texts (1) are pasted to the right of the previously highlighted texts (2).
2
1
 |
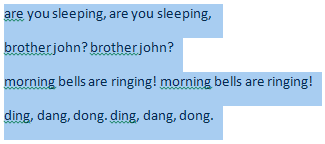
Repeat the Steps 6 – 9 to produce the following output, i.e. (1), (2) and (3).
3
2
1
 |
Save the document.
Close MW2010.
By completing this exercise, you have learned to:
Highlight texts using mouse click and drag.
Copy texts using Copy Button.
Paste texts using Paste Button.
Change Case Formatting
(Expected duration: 15 minutes)
Start MW2010.
Open “brother-john.docx”.
The letter case of the content can be modified according to the pre-set format available from the “Change Case” button in the Font Group of the Home Tab.
 * * |
Highlight all texts, click the “Change Case” Button and apply “Sentence Case.” Format.
 * * |
Notice that the first letter in the first word of every sentence has been capitalized. However, the second line of the content contains special names and therefore the first letter of each word must be capitalized. Select the second line and apply “Capitalize Each Word” format.
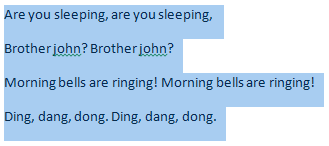 * * |
The final output will look as follows. Notice that the green zigzag underline has disappeared, i.e. there is no spelling mistake anymore.
 * * |
By completing this exercise, you have learned to:
Use “Change Case” button to set “Sentence Case.” format.
Use “Change Case” button to set “Capitalize Each Word” format.
No comments:
Post a Comment